
Sewing Tutorial #1: High Waisted Skirt with Elastic Band
Wednesday, April 27, 2011
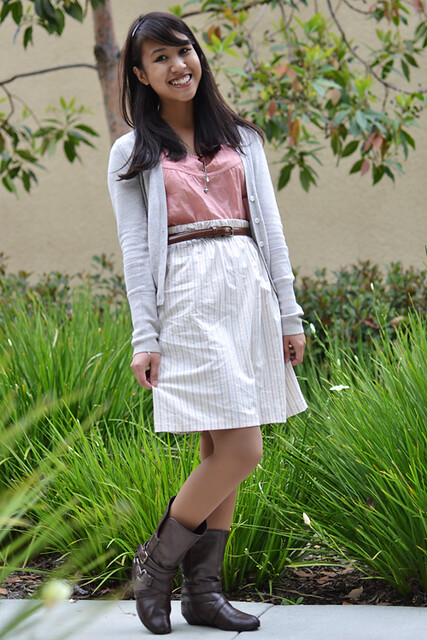
Hi! So I'll be trying my very best to write a tutorial on the skirt I wore on Easter (you can see it here!). :) Please bear with me as I'm just a beginner in sewing!
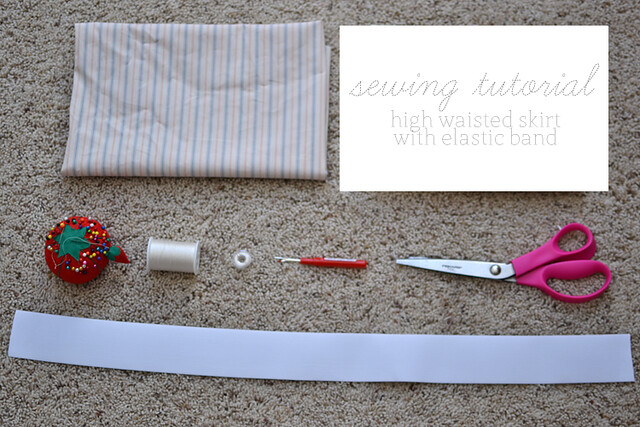
In the photo above is what I used. Assuming you have the basics (thread, sewing machine, scissors, pins, etc.), here's the most important part!
- Fabric (I used 3/4 of a yard, but it'll probably look nicer if you use a full yard . The more fabric you use, the more fuller the skirt.)
- Elastic (I pulled it around my waist until it felt snug but comfy, then added about an inch and cut! The extra inch is for when I sew the ends of the elastic together later.)

1. Lay out your fabric. Place the elastic at the top with about 1 inch from the edge. Mark the bottom of the elastic. That's going to be the very top of the skirt!
2. Measure how long you want your skirt to be from your waist down. Mine was 22 inches. Starting from where you marked and measure all the way down. Mark it. Now add 2 more inches for the bottom hem and cut!
3. Take your fabric inside out and line up the two sides of the fabric. You're going to sew the ends together so it looks like this:

Hopefully, you have just a tube of fabric! Now comes the more difficult part - the waistband. But don't worry, it's not too bad.
4. With the skirt still inside out, take the very top of the fabric and fold over an inch. Next, fold it over to the push pin that marks the top of the skirt. You want to lie down your elastic on top to make sure that it will be fit in the band, but you also want it to be snug so the elastic doesn't get all twisted when you wear it. Then use your push pins to keep it still. It should like this:

See? It's pretty tight. That elastic ain't goin' nowhere! >:)
5. Now, starting from where you made the side seam, you're going to sew the band shut at the bottom like so:
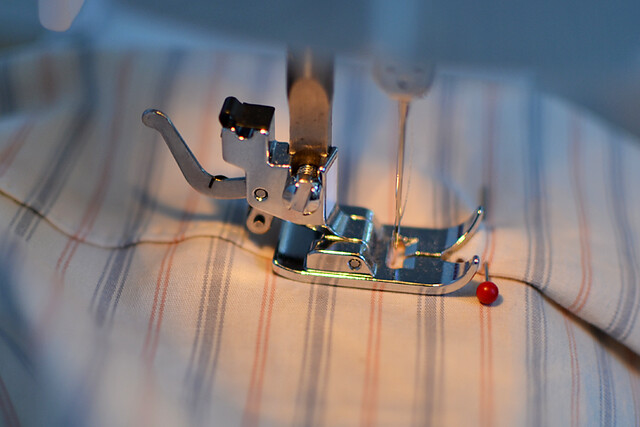
You're going to want to sew as close to the edge as you possibly can so that the elastic will still fit. It is good to check every once in a while whether the elastic will still fit through by just laying it on top of the waistband and seeing if you can still see the seam.
Once you sew around, you want to stop about 4 inches before the beginning.
6. Through this gap, thread the elastic through! I personally like to put a safety pin on the elastic and thread it through, holding tight to the end. Once you put it all the way through the skirt, overlap the elastic by about an inch and sew it securely. I did it twice because it's a rather big elastic. Also, because it's pretty thick your sewing machine may mess up a couple times... but don't be discouraged! Keep calm!
(This may look like a lot of excess elastic, but I really just pushed all the fabric away for the photo. In reality, there's wayyyy more fabric! I had to take this photo fast because the fabric kept coming back up, haha.)
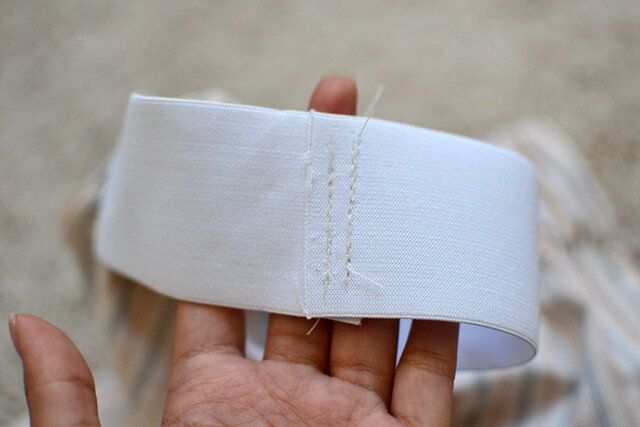
7. Once your elastic is sewn, sew up the 4 inch gap the same way you sewed the rest of the waistband (snug and as close to the edge as possible). You want to do this one carefully so that you don't sew the elastic!
You're almost there...
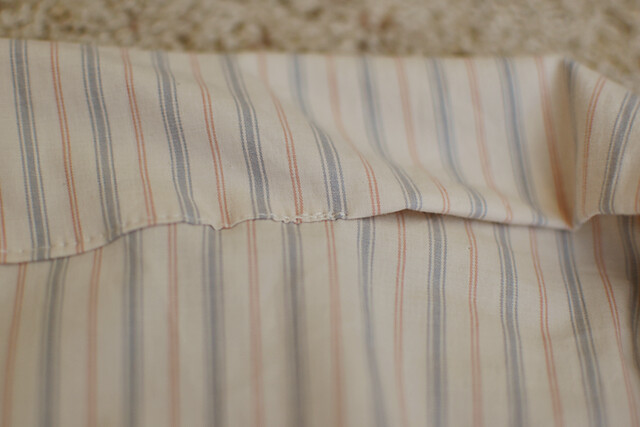
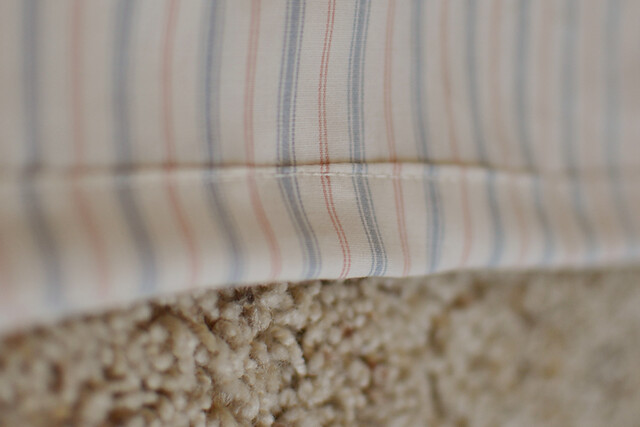
8. Hem the bottom of the skirt by folding over one inch, then folding over again. And your hem should look like this:
9. Go try on your new skirt!!! :D
There you go! I really hope this makes sense! Please, please, please let me know if I can clarify anything for you! I will gladly do so, of course. And if you get around to using the tutorial, I would LOVE to see what you come up with! :D Take care, everyone, and happy sewing!!!

Labels: caroline, sewing projects, tutorial
7 Comments:
thanks so much for posting this girl! very very helpful and clear. i am going to attempt it! :)
Oh my goodness. Not even joking, I was planning on sewing myself a skirt sometime in the next few weeks. I found fabric thrifting the other day and then went out and bough elastic just yesterday. Thanks for posting--since I was going to go into it blind. So exciting! Because I'm super new to sewing too. Your fabric is so cute and pretty.
I'm so lucky have to have such a talented best friend. =)
Love,
Erin
so lucky to have***
Oh, I adore this project...the style and the pattern you chose is pure perfection!!!! :)
xx Cat brideblu
I love this quick and easy tutorial! I keep on wanting to invest in a sewing machine and then I realize that I should also invest in some time to sew. I love how your skirt turned out though! :)
it looks so good girl!! great job :)
Post a Comment
Subscribe to Post Comments [Atom]
<< Home